Tuesday, April 5, 2016

Spirograph

I was snooping around in my nieces craft box when I came across this little gem. It was a christmas gift from months ago and it wasn't even opened yet!!! What? They obviously had no idea what treasure lay inside this cool retro-looking tin. Of course I opened it and read all of the directions to re-familiarize my now adult eyes to this amazing gizmo. I thought it would all come back to me just like riding a bicycle. It wasn't as difficult as a bike, but I certainly needed to reacquaint my hand muscles to all of this rotating stuff. 
My first attempt was a little shaky and my pen kept slipping out of the hole. Even my modern neon markers were not helping me.
I discovered if you used one of the holes closer to the centre it was a little easier to control. Also if you worked it with confidence and pretended that you knew what you were doing it was a bit easier. I used the #60 circle on both of these but just switching the holes made the shapes so different. I even fancied it by using several different colors. Try to do that Louella and Marley! (My nieces are 9 and 7)
I discovered that it did work better if you used the provided Spirograph markers, but the colors are not as cool.
In their stash they also had this other circles/shape making thing-a-ma-jig so I gave it a whirl too. It was a little easier to use, but it didn't have the endless possibilities you got with the original...
I experimented with color combos and made these cool eye teasers that look like they are vibrating!
I was pretty proud of this neon work of art.
Then I dragged out some color paper and jelly pens...
Things got very interesting. I looked around on the internet for a little inspiration and found a few fun ideas I will definitely need to try when I get the chance.
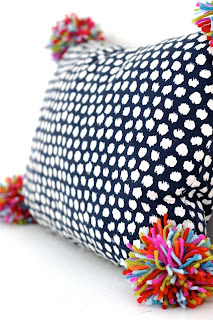
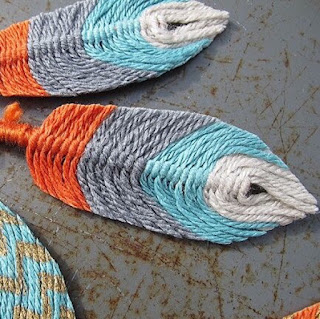
Spiro onto fabric and stitch over it...
~.~.~.~.~
Wrapping papers...
:) :) :)
 Shrinky Dink jewelry!!!
Neon gift tags...
Calendars...
 Limited editions...
 Originals...
The possibilities are endless! I am going to find my fabric markers next.


Friday, March 11, 2016

Day 60 of my Ugly Tie Hexie Quilt wallhanging. (Formerly a pillow cover)

I am embarrassed to say that I have been "working" on this quilt for over 2 months. In my defense, I have not worked on it full time (I have a 2 year old), and I never did a Hexie Quilt before.  I thought it would be fun to try with my Dad's old tie collection. #uglyties #hexiequilt
Cuting out and then sewing together all the little hexigons was a little tedious, but embellishing them with beads and thread was a little more exciting. Halfway through sewing them all together I decided that I did NOT have the patience/time to actually create a pillow cover. A "simple" wall hanging would have to do.
So now I am trying to figure out how to finish and hang my masterpiece. It needs to be done by April 5th for my Dad's birthday...
I thought I would simply sew it to a felt backing and hang it like that, but I didn't like the way it looked so UNfinished.  I decided to go a little fancy and show some crazy hash stitches on the white felt. That looks kind of cool. So much for making a simple wall hanging. This has gotten way out of hand.....
Did I mention that I have been doing all those little stitches in my laundry room on my dryer? It has the best natural light, and the dryer is at the perfect height...

To be continued...


Sunday, March 6, 2016

Cute DIY gift idea to give to a visitor

A few weeks ago my dear friend Xiaoning stayed with me for a few days in Panama. Among all of the exciting things we did, was seeing the beautiful Isla de Contadora. When I scout beach stones for my collection #beachcombing I like to see what they look like wet. I happened to snap a photo of this little guy and she thought it was cute.  Flash forward one week...
I was looking at my stash and remembered how she liked my smiley stone. I thought it would be so cute if I could find a way to send one to her to remember her stay with me.
I took some clear nail polish and painted a face on one of my stones.  Dead ringer for the original!!! 
To make it even more special, I wrote the date and place on the back with a coloured pencil, and sealed it with a clear nail polish heart.
That is when my 2 year old daughter wanted to join in on the fun. She created the face above.
Then I added PINK nail polish and glitter to the mix. #toddlerfun
I let her decorate some #seaglass that I will send along with my stone.

Come and visit again Xiaoning!!!!!!!!!!!


20 fun things to do with scrap yarn (even if you don't crochet)

I love yarn. The texture, the color, the promise of something cool to be made. The problem is I don't have a lot of patience to actually knit or crochet or weave something cool. I buy pretty yarns and strings, and stow them away to wait for inspiration to strike. Here are a few ideas for that yarn stash that don't require that much planning, or patience.
Wrap a chair.
Wrap hangers.
Wrap flip flops,
or some gifts.
Make a wreath,
or a mobile.
decorate a pillow,
or some branches.
Sew it.
Weave it.
Embroider it.
Dream about it.
Make LOVE.
Make art,
jewelry,
Yarn feathers.
Yarn moustache.
Yarn bomb!

There are SO many things to do with yarn that don't involve time consuming knitting or crochet.  Sometimes yarn is so pretty I like to just look at it and dream...